Use Case: Building a Document Q&A Agent (RAG)
Welcome to your first major project! This guide will walk you through building a powerful AI assistant that can read a PDF document and answer questions about it. This technique is known as Retrieval-Augmented Generation (RAG), which is a fancy way of saying the AI retrieves information from a source you provide before it generates an answer.
Your Goal: To ask a question in plain English and get an intelligent, accurate answer based only on the contents of your PDF.
The Building Blocks (Nodes)
For this workflow, you will need the following nodes from your tool palette:
- Start Node: To ask our initial question.
- LLM: To provide the "brain" for our agents.
- PDF Tool: To load and read our document.
- Ai Agent (x2): We will use two agents for a sophisticated, two-step process.
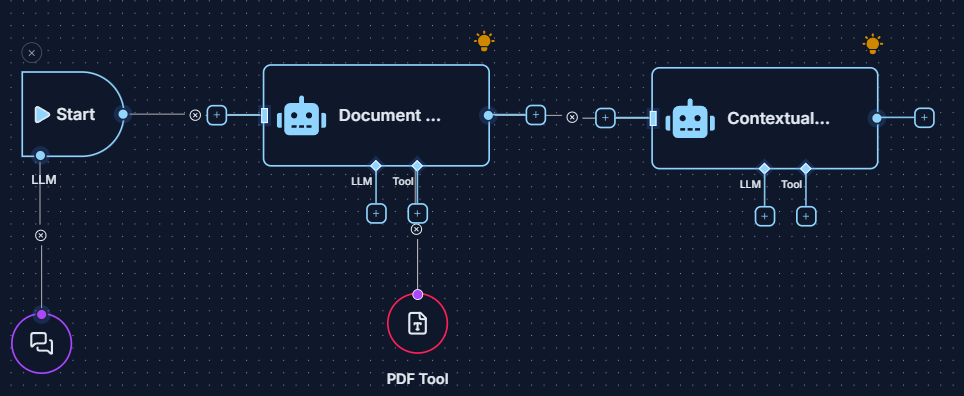
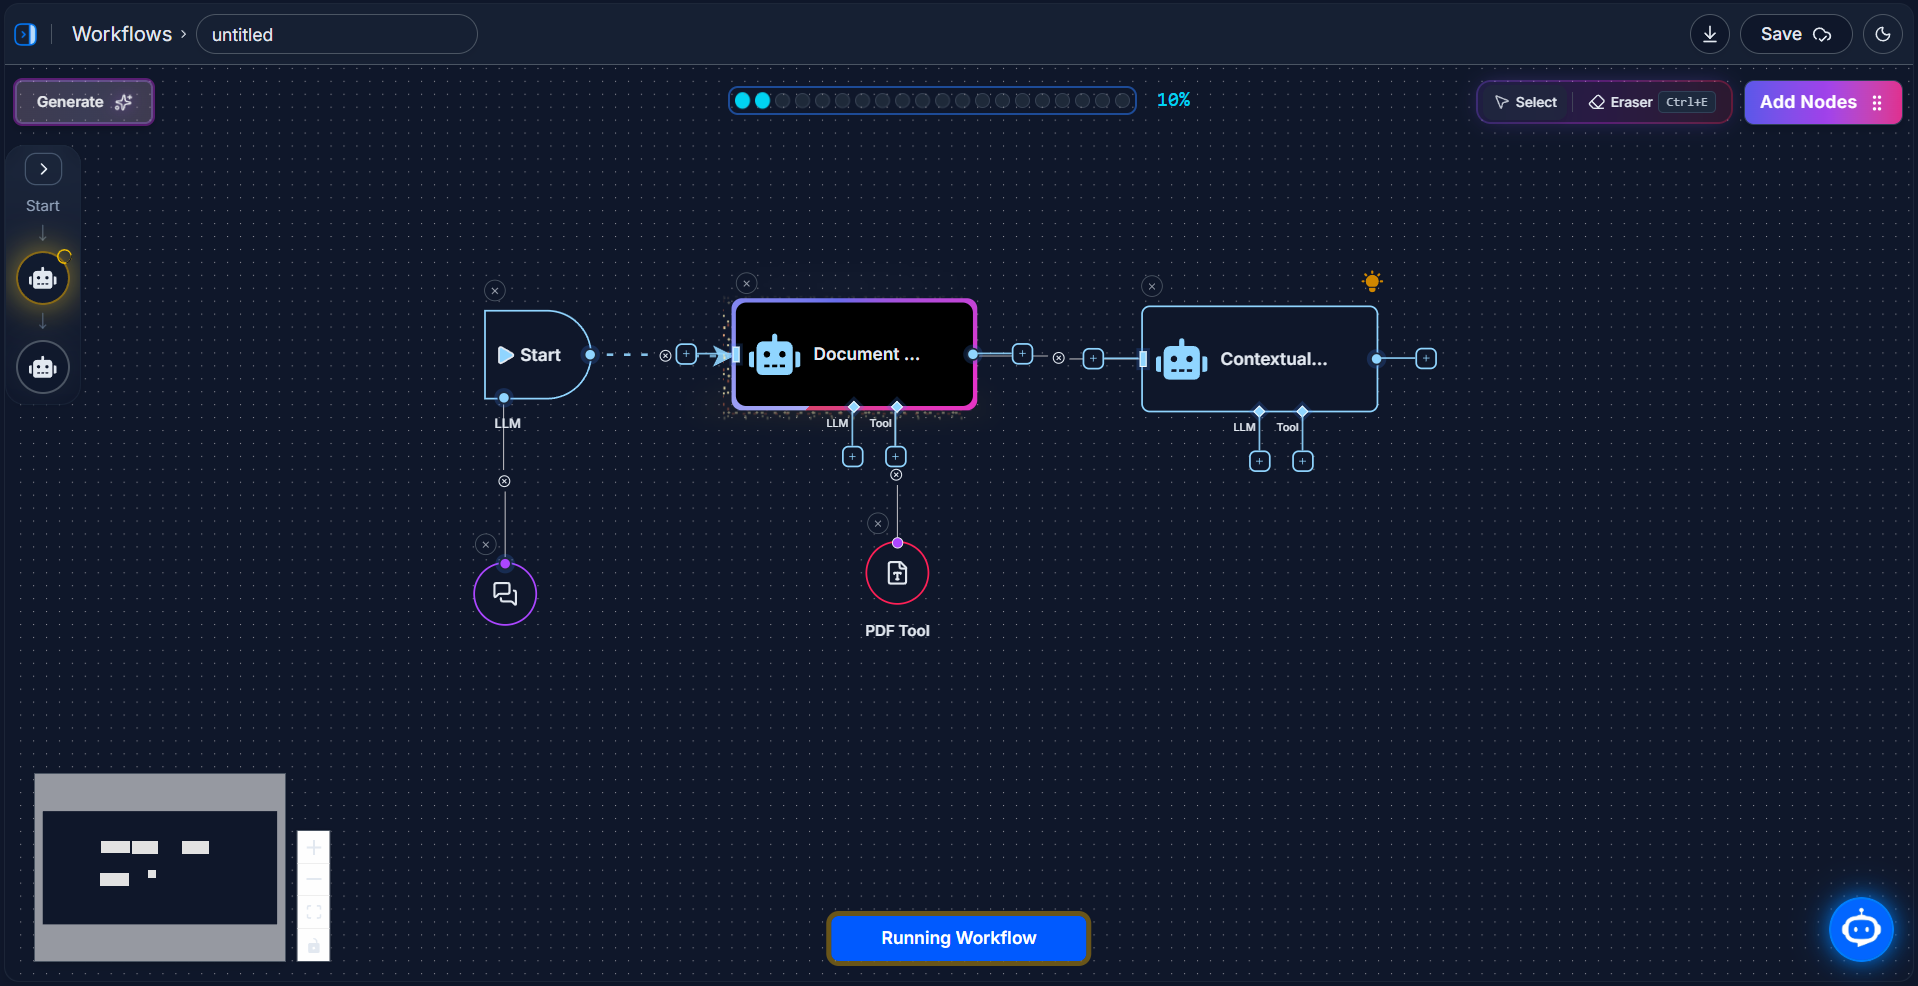
Step 1: Assemble Your Workflow
First, let's build the structure of our workflow on the canvas. The logic is to have one agent extract the raw text, and a second agent analyze that text to answer our question.
- Drag and Drop: Add the Start Node, one LLM node, the PDF Tool, and two Ai Agent nodes to your canvas.
- Set the Global LLM: Connect the LLM node to the
LLMinput on the Start Node. This sets the default AI brain for the entire workflow. - Connect the Flow:
- Connect the Start Node to the first Ai Agent.
- Connect the first Ai Agent to the second Ai Agent.
- Connect the Tool: Connect the PDF Tool to the
Toolinput on the first Ai Agent.
Your final workflow structure should look like this:
Step 2: Configure Each Node
Now, let's give each node its specific job.
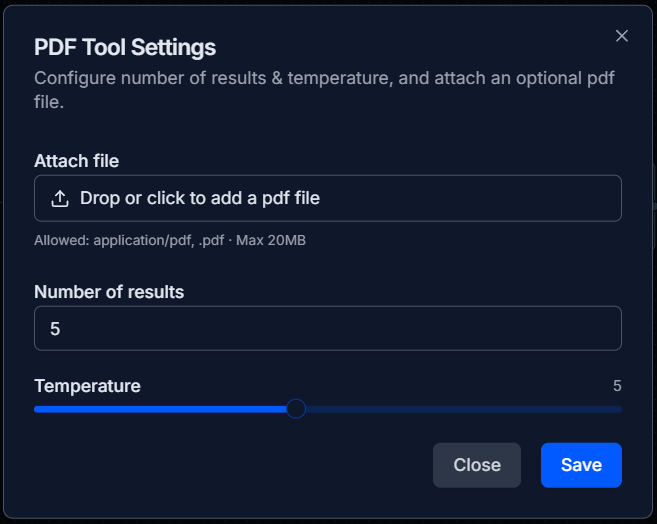
1. The PDF Tool
This tool will hold our knowledge base.
- Action: Double-click the PDF Tool.
- Configure: In the settings panel, drag and drop the PDF file you want to ask questions about. Click Save.
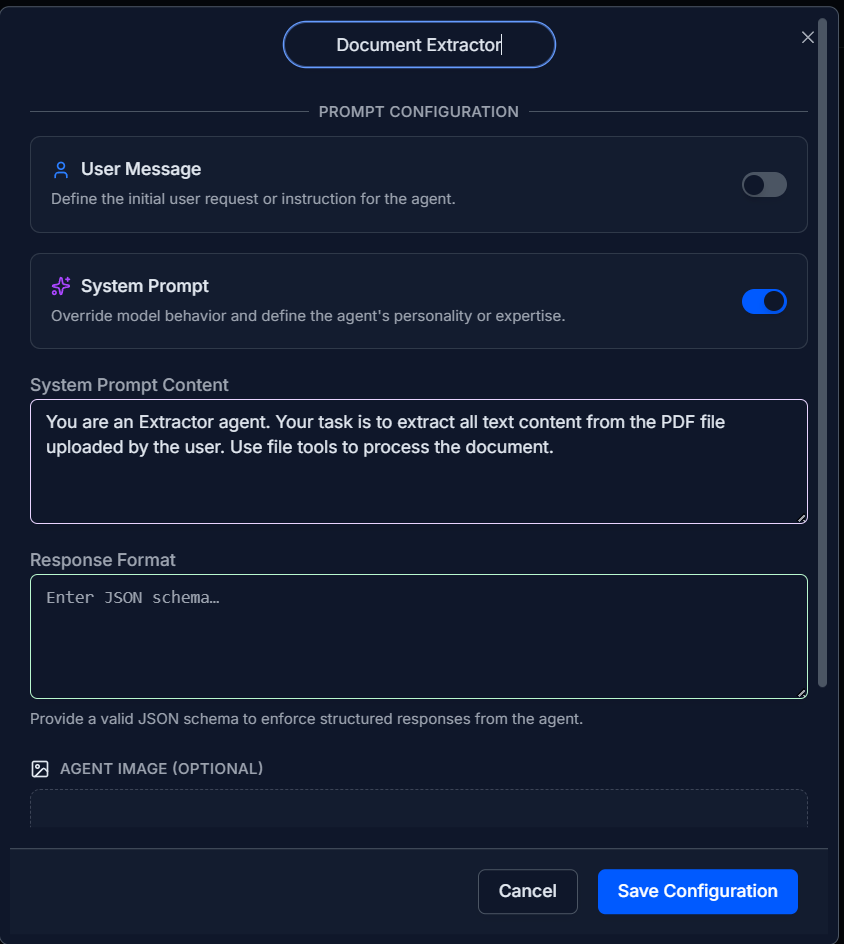
2. The First Ai Agent (The "Document Extractor")
This agent's only job is to read the PDF and extract its text.
- Action: Double-click the first Ai Agent and give it the name "Document Extractor".
- Configure: Turn on the System Prompt and give it this instruction:
You are an Extractor agent. Your task is to extract all text content from the PDF file uploaded by the user. Use file tools to process the document.
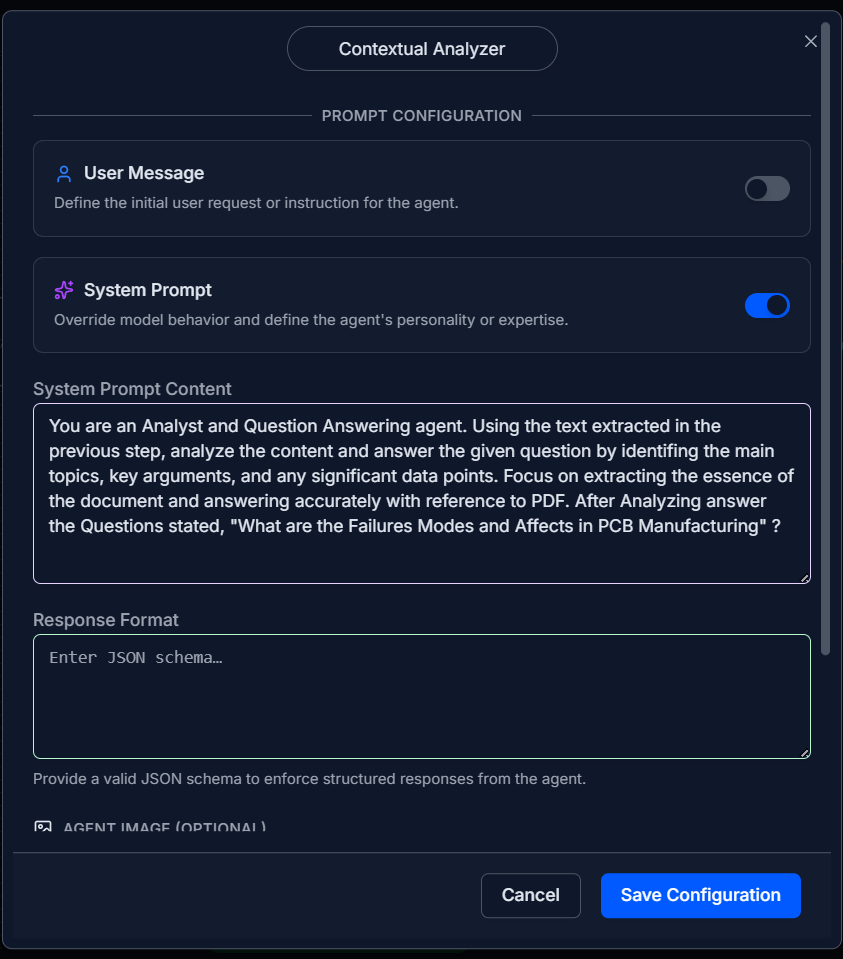
3. The Second Ai Agent (The "Contextual Analyzer")
This agent is the main thinker. It takes the extracted text from the first agent and the user's question from the Start Node to find the answer.
- Action: Double-click the second Ai Agent and name it "Contextual Analyzer".
- Configure: Turn on the System Prompt and give it this instruction, including your specific question at the end:
You are an Analyst and Question Answering agent. Using the text extracted in the previous step, analyze the content and answer the given question by identifying the main topics, key arguments, and any significant data points. Focus on extracting the essence of the document and answering accurately with reference to the PDF. After analyzing, answer the question: "What are the Failures Modes and Affects in PCB Manufacturing?"
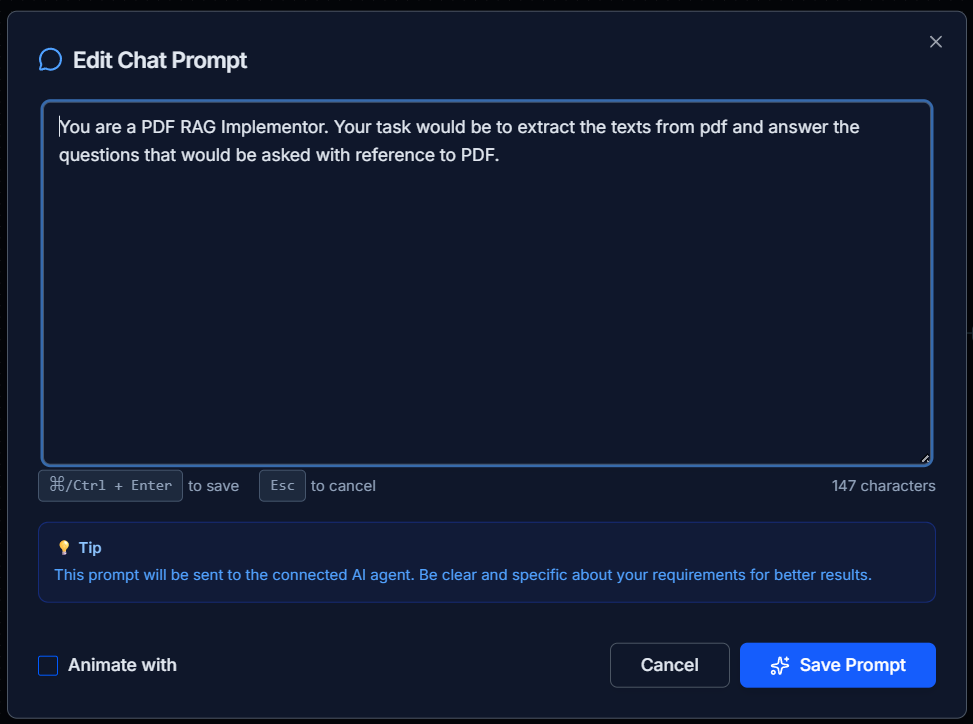
4. The Start Node
This is where you give the initial command that ties everything together.
- Action: Double-click the Start Node.
- Configure: Enter a prompt that tells the system what your overall goal is:
You are a PDF RAG Implementor. Your task would be to extract the texts from pdf and answer the questions that would be asked with reference to PDF.
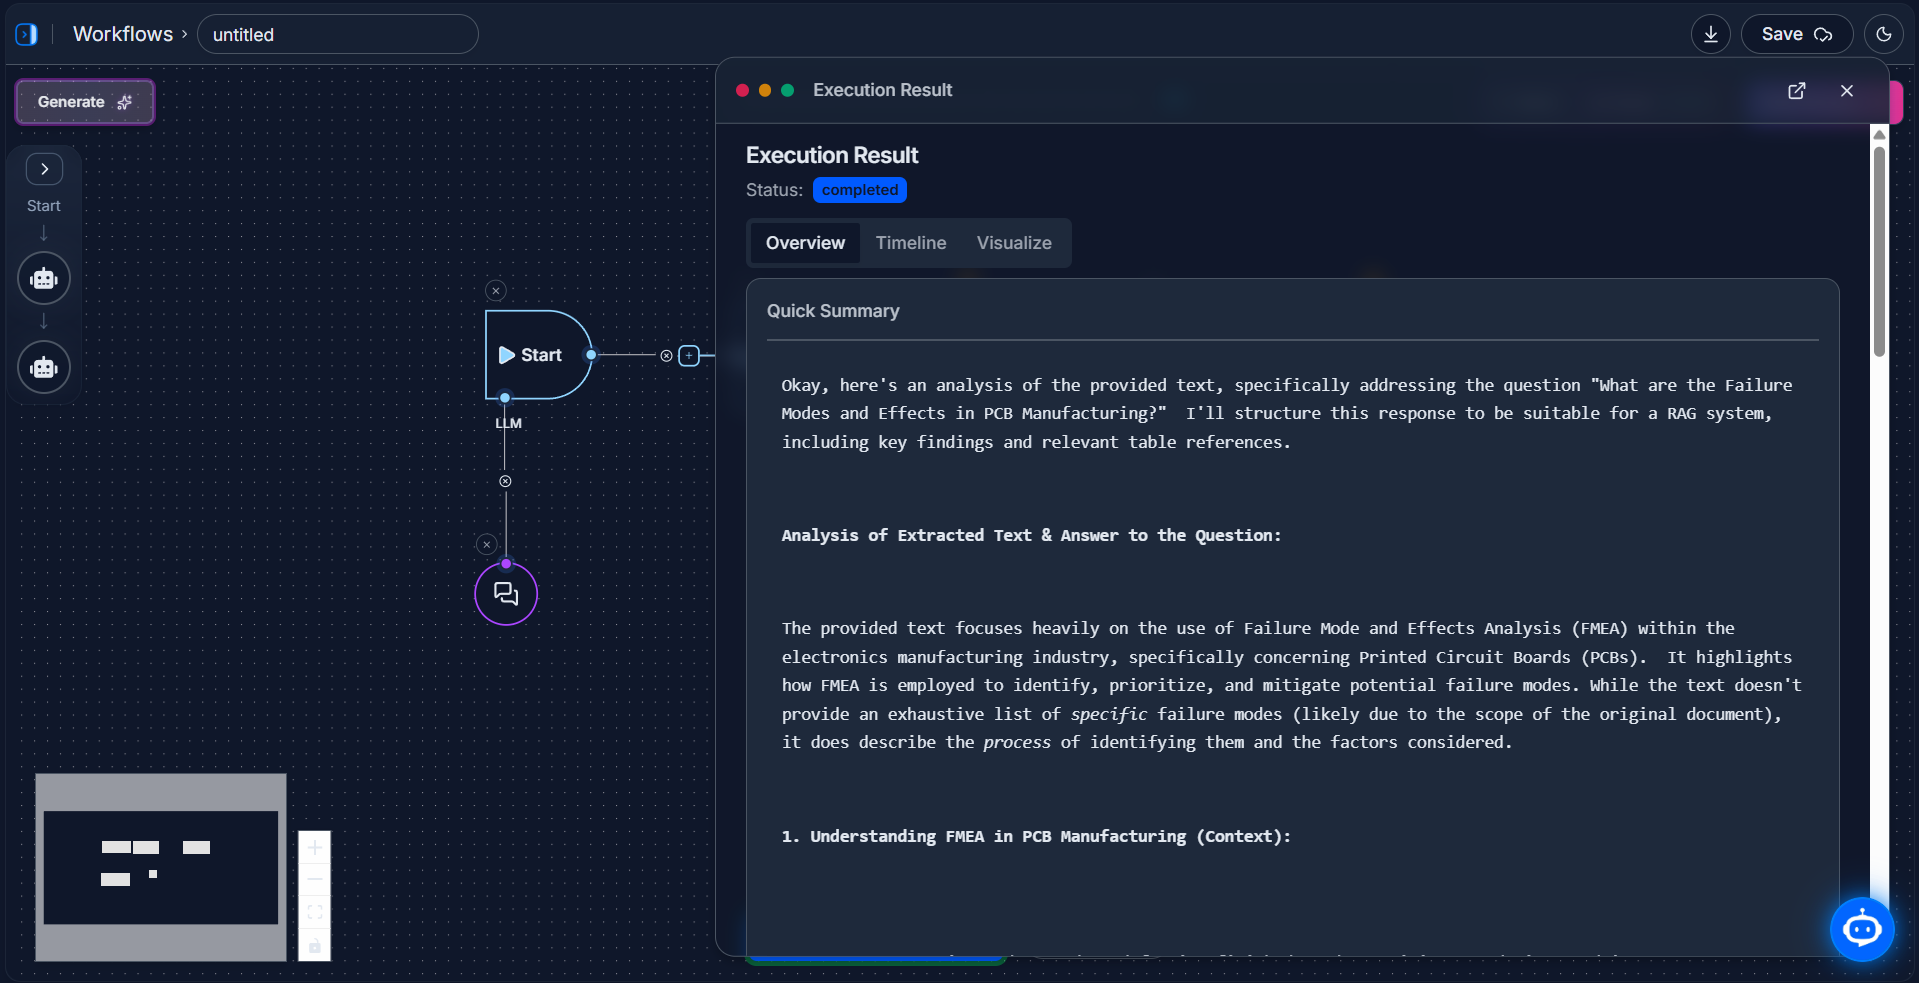
Step 3: Run the Workflow & See the Results
With everything configured, you're ready to run your automation.
-
Click "Run Workflow": Find the button at the bottom of the canvas and click it.

-
Watch it Run: You'll see the workflow execute in real-time. A glowing border will show which node is currently working.
-
Check the Final Result: Once the workflow is complete, click the "Logs" button in the top-right corner. The Execution Result panel will open, showing you the detailed, final answer generated by your Contextual Analyzer agent.
Congratulations! You have successfully built a sophisticated AI agent that can read and understand your documents.